Unleashing Your Creativity: Explore Amazing DIY Tire Projects for Home and Garden
When it comes to DIY tire projects, the possibilities are virtually endless. With a bit of creativity and some elbow grease, you can turn old tires into something functional, beautiful, or just plain fun. In this blog, we will explore eight fantastic DIY tire projects that you can try at home, ranging from the classic tire swing to some more innovative ideas. Whether you’re a DIY novice or a seasoned pro, these DIY tire projects are sure to inspire you to get started on your own upcycling adventure.
Before diving into these exciting projects, it’s essential to know how to properly clean your tires to ensure a safe and polished result. You can refer to our guide for all the information you need on prepping the tires for your DIY tire projects.
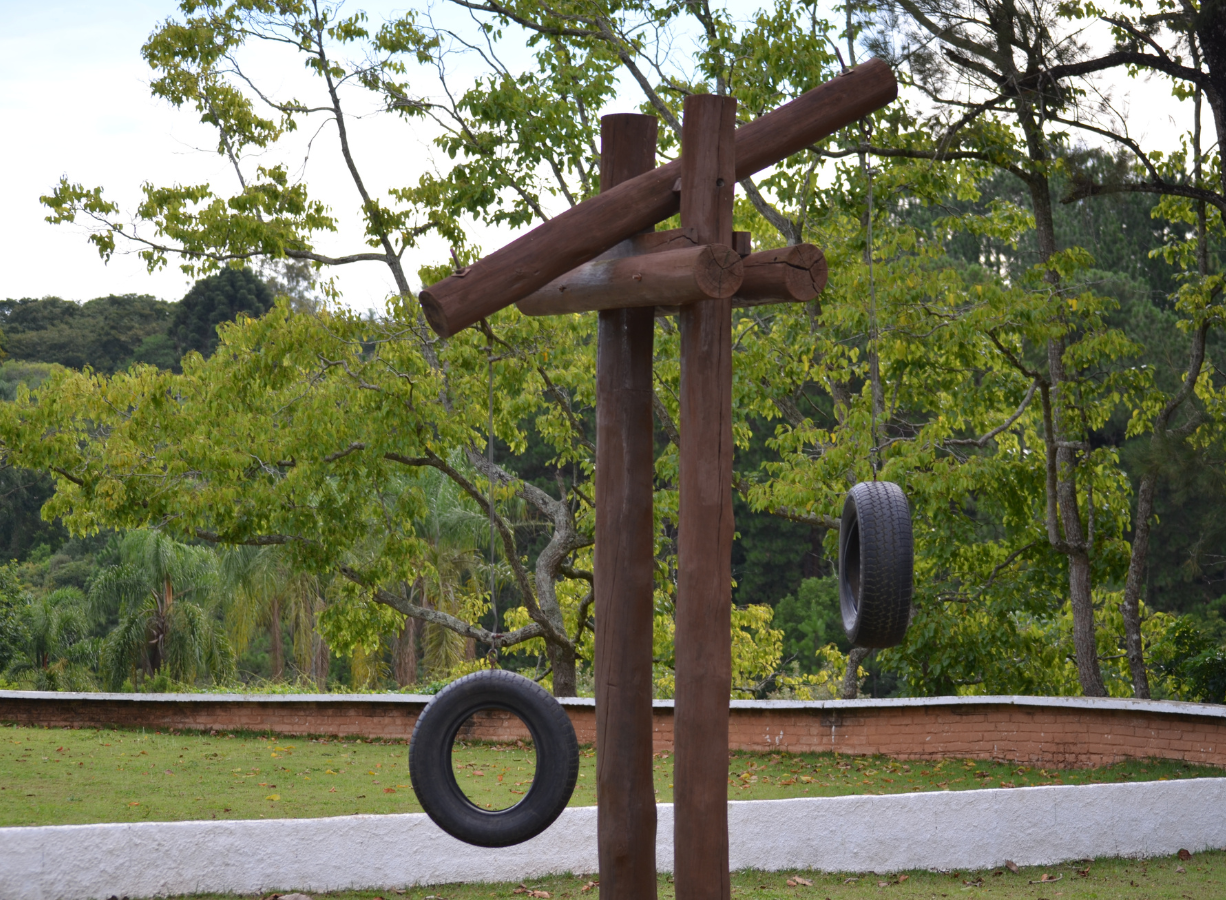
The Classic Tire Swing: Timeless Fun (Easy)
Time to complete: 1-2 hours
Materials needed:
An old tire
20-30 feet of strong, weather-resistant rope (such as marine-grade nylon rope)
A sturdy tree branch or swing set
A drill with a 1/2-inch bit
A carabiner or a strong metal hook
Instructions:
Begin by cleaning the tire thoroughly, removing any dirt, grime, or debris.
Drill three evenly spaced holes along the sidewall of the tire. This will allow water to drain out, preventing it from becoming a breeding ground for mosquitoes.
Measure and cut your rope, ensuring you have enough length to secure the tire to the branch or swing set.
Thread the rope through the tire, and tie a secure knot on the bottom of the tire.
Throw the other end of the rope over the branch or swing set, and use the carabiner or metal hook to secure it in place.
Adjust the height of the tire swing as necessary to ensure it hangs at a comfortable height for users.
Benefits: The Joyful Perks of a DIY Tire Swing
Creating a DIY tire swing offers numerous benefits for both children and adults alike. First and foremost, tire swings provide a fun and engaging outdoor activity that encourages physical activity, fostering healthy habits and promoting overall well-being. Tire swings can help improve balance, coordination, and motor skills while also providing a stimulating sensory experience as children spin, sway, and swing through the air.
Additionally, building a DIY tire swing allows for personalization and creativity, as you can choose the design, color, and location to best suit your preferences and space. This customization aspect can instill a sense of pride and accomplishment once the project is complete. Furthermore, a DIY tire swing is a cost-effective alternative to store-bought playsets, allowing you to create a lasting source of enjoyment for your family without breaking the bank.
Finally, constructing a tire swing is an eco-friendly endeavor, as it gives new life to an old tire that might otherwise end up in a landfill. This repurposing helps reduce waste and promotes sustainability, teaching children valuable lessons about resourcefulness and environmental stewardship. Overall, a DIY tire swing is a fantastic addition to any outdoor space, providing endless fun, fostering healthy habits, and encouraging eco-friendly practices.
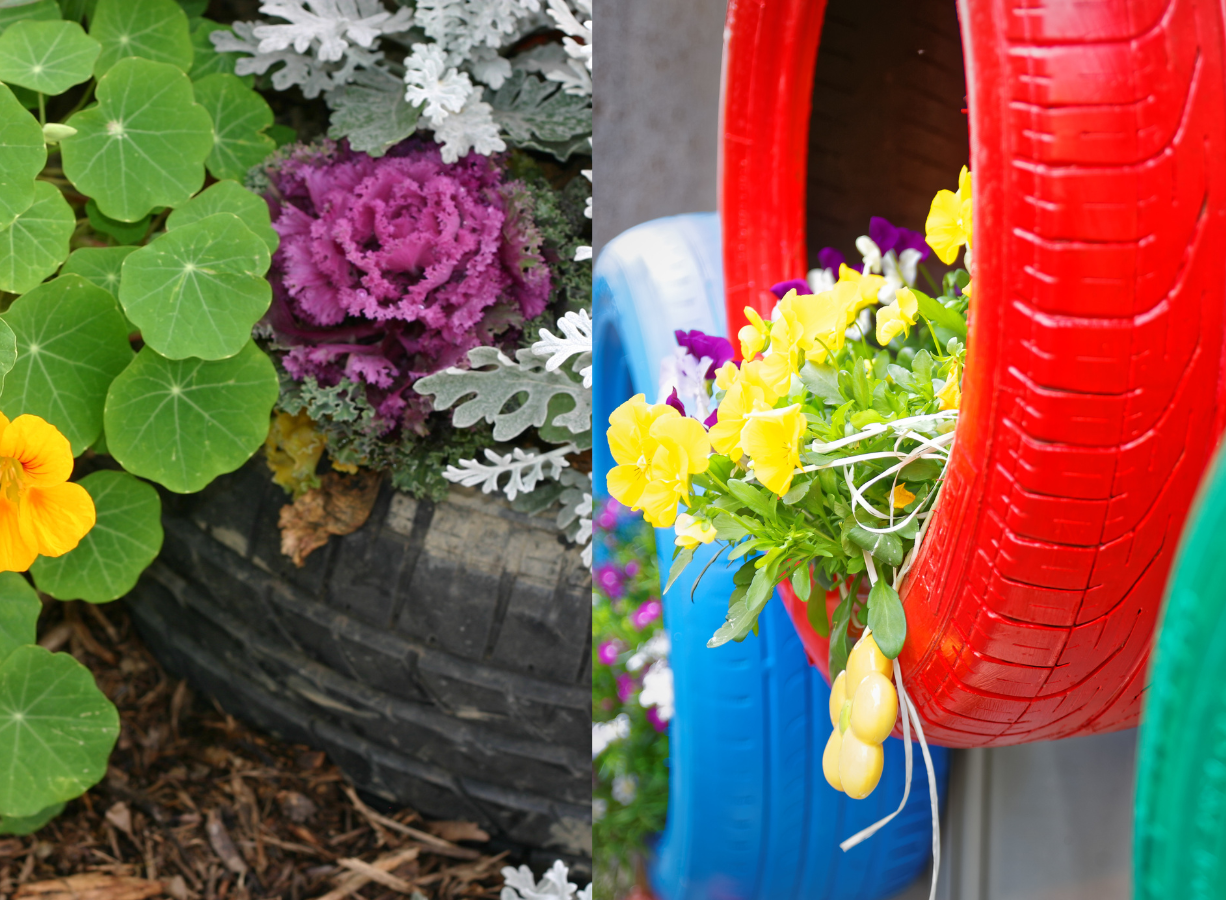
Tire Garden Planters: A Green DIY Tire Project (Intermediate)
Time to complete: 2-3 hours
Materials needed:
Old tires
Heavy-duty scissors or a utility knife
A drill with a 1/2-inch bit
Outdoor spray paint (optional)
Potting soil
Plants or seeds
Instructions:
Thoroughly clean the tires to remove any dirt, grime, or debris.
Using heavy-duty scissors or a utility knife, carefully cut away the sidewall of the tire. This will create a larger opening for your plants.
Drill several drainage holes in the bottom of the tire.
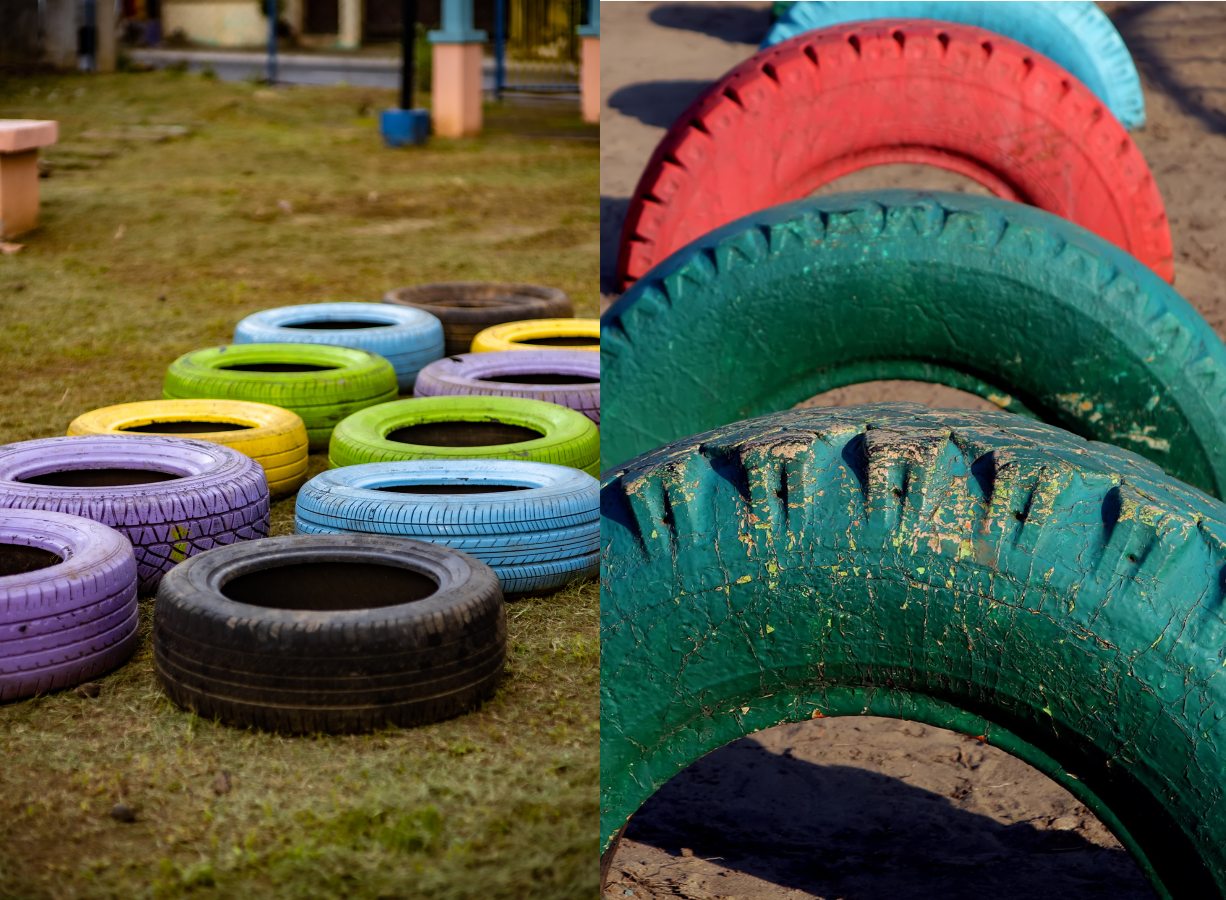
If desired, apply a coat of outdoor spray paint to the exterior of the tire to add a pop of color to your garden.
Fill the tire with potting soil and plant your desired flowers, vegetables, or herbs.
Arrange your tire planters in your garden or outdoor space, and enjoy your new, eco-friendly garden display.
Benefits: The Advantages of Tire Garden Planters in DIY Tire Projects
Growing Greener: Tire garden planters are an innovative and eco-friendly option for those looking to start a garden or enhance their existing outdoor space. As part of your DIY tire projects, transforming old tires into garden planters offers numerous benefits, adding both functionality and aesthetics to your green space.
One significant advantage of tire garden planters is their excellent insulation properties. The thick rubber material helps maintain stable soil temperatures, protecting plant roots from temperature fluctuations and promoting healthy growth. This attribute makes tire planters suitable for various climates and growing conditions.
Another benefit of tire garden planters is their impressive durability. Rubber is built to withstand harsh weather and extreme conditions, ensuring that your planters remain intact and functional throughout the seasons. This durability translates into long-lasting garden solutions that reduce the need for frequent replacements, saving both time and money.
In addition, tire garden planters offer unmatched versatility when it comes to design and style. With some creativity and a splash of paint, you can customize the look of your planters to match your garden’s theme or personal style preferences. This adaptability allows for unique and eye-catching garden displays that truly reflect your personality.
Lastly, the use of tires as garden planters contributes to a greener and more sustainable future. By repurposing old tires that would otherwise end up in landfills, you actively participate in reducing waste and promoting a circular economy. DIY tire projects, such as tire garden planters, emphasize the importance of resourcefulness and environmental consciousness while providing practical and visually appealing solutions for your gardening needs.
Tire Ottoman: A Stylish and Functional DIY Tire Project (Intermediate)

Time to complete: 3-4 hours
Materials needed:
An old tire
Plywood (2 circles cut to the diameter of the tire)
Wood screws
A drill
Upholstery foam
Fabric
A staple gun
Rope or twine (optional)
Instructions:
Thoroughly clean the tire to remove any dirt, grime, or debris.
Attach the plywood circles to the top and bottom of the tire using wood screws and a drill, ensuring the plywood is flush with the edges of the tire.
Cut a piece of upholstery foam to fit the top plywood circle, and attach it using a staple gun.
Cut a piece of fabric large enough to cover the foam and plywood, and secure it with the staple gun, pulling the fabric tight as you go.
If desired, wrap the sides of the tire with rope or twine, securing it with a strong adhesive or staples as you work your way around the tire. This step is optional but can add a stylish, finished look to your ottoman.
Place your completed tire ottoman in your living room, bedroom, or outdoor space for a comfortable and functional seating option.
Benefits: The Perks of Crafting a DIY Tire Ottoman
Stylish Comfort: Creating a DIY tire ottoman as part of your repertoire of DIY tire projects offers a unique and rewarding way to enhance your living space. By upcycling an old tire into a functional and attractive piece of furniture, you enjoy numerous benefits that extend beyond aesthetics.
One significant advantage of a DIY tire ottoman is its cost-effectiveness. Building a tire ottoman from scratch can save you money compared to purchasing a ready-made piece. With just a few materials and a bit of creativity, you can craft a personalized ottoman that suits your style and budget.
Another benefit of crafting a tire ottoman is the opportunity for customization. As you embark on your DIY tire projects, you can choose the fabric, color, and design elements that best match your home decor. This flexibility allows you to create a one-of-a-kind piece that truly reflects your taste and personality.
In addition to its visual appeal, a tire ottoman is an environmentally friendly choice. By repurposing an old tire, you actively contribute to reducing waste and promoting a more sustainable lifestyle. This eco-conscious approach aligns with the growing trend of upcycling and resourcefulness, providing a practical solution for those looking to minimize their environmental footprint.
Lastly, creating a DIY tire ottoman can be a fun and engaging project for individuals and families alike. Working on a tire ottoman can foster a sense of accomplishment and pride in your work, making it a worthwhile addition to your list of DIY tire projects. By combining practicality, style, and sustainability, a tire ottoman is an excellent option for enhancing your home while staying environmentally responsible.
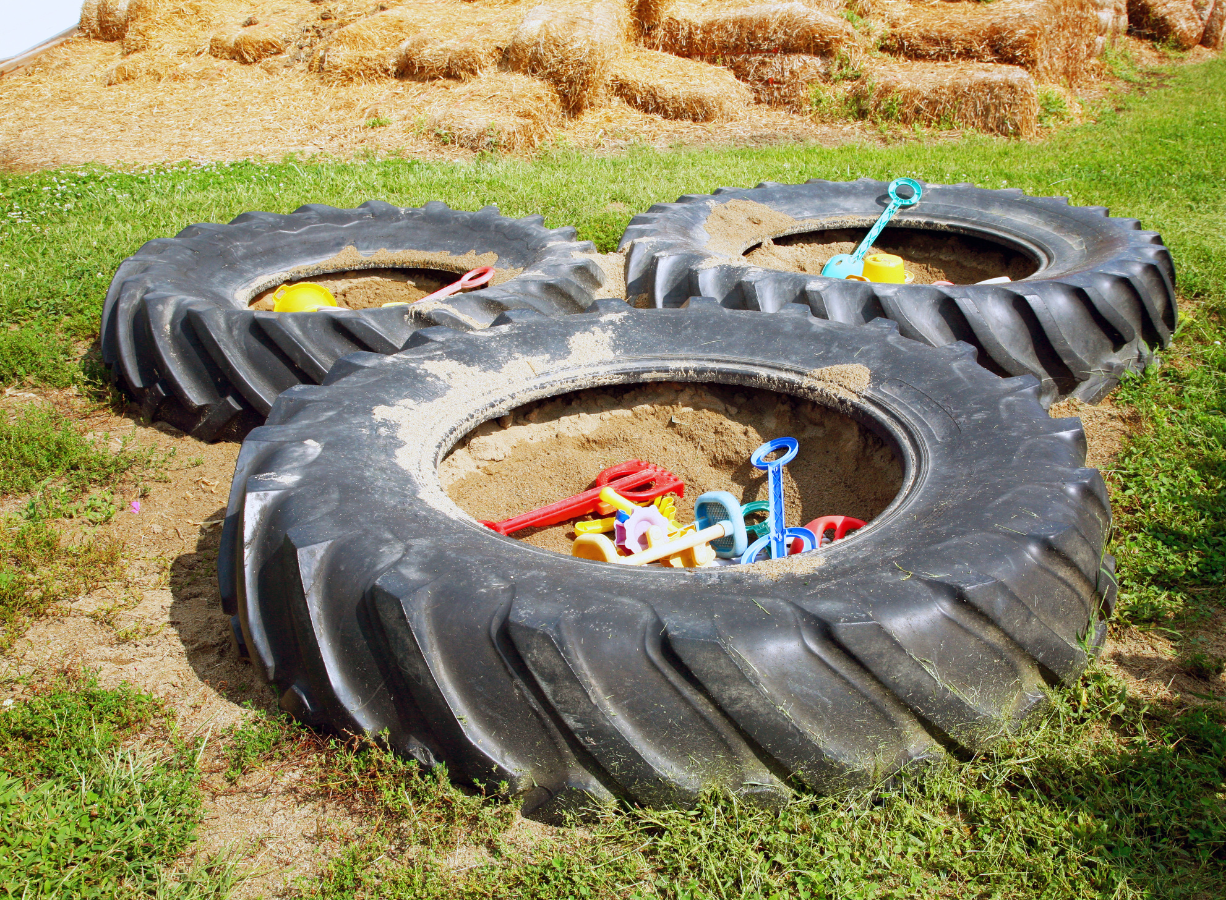
Tire Sandbox: A Fun and Inexpensive DIY Tire Project for Kids (Easy)
Time to complete: 2-3 hours
Materials needed:
A large tractor tire (or multiple smaller tires)
Heavy-duty scissors or a utility knife
A tarp or weed barrier fabric
Sand
Toys, buckets, and shovels
Instructions:
Thoroughly clean the tire to remove any dirt, grime, or debris.
If using smaller tires, cut away the sidewalls using heavy-duty scissors or a utility knife. This will create a larger opening for the sandbox.
Lay down a tarp or weed barrier fabric in the designated area for the sandbox to prevent grass and weeds from growing through.
Place the tire (or tires) on top of the tarp or weed barrier fabric.
Fill the tire with sand, creating a depth of at least 6 inches for optimal play.
Add toys, buckets, and shovels to your new tire sandbox and watch your children enjoy hours of outdoor fun.
Benefits: The Advantages of Constructing a DIY Tire Sandbox
Playtime Paradise: Building a DIY tire sandbox as part of your collection of DIY tire projects is a fantastic way to create a fun and engaging outdoor play area for children. Constructing a tire sandbox offers numerous benefits, from fostering creativity to promoting sustainability.
A significant advantage of a DIY tire sandbox is its cost-effectiveness. By repurposing an old tire and using a few additional materials, you can create a charming play area for a fraction of the price of commercial sandboxes. This budget-friendly solution allows families to enjoy the joys of a sandbox without a hefty financial commitment.
Another benefit of a tire sandbox is its ability to stimulate children’s imagination and creativity. Playtime in a sandbox can help develop important skills such as problem-solving, spatial awareness, and fine motor skills. Moreover, sandbox play encourages social interaction and cooperation, contributing to a child’s overall emotional and social development.
In addition, a DIY tire sandbox provides a customizable play area that can be tailored to your preferences and space constraints. The flexibility in design allows you to create a sandbox that suits your garden or backyard, making it a versatile addition to your DIY tire projects.
Finally, constructing a tire sandbox is an eco-friendly choice that demonstrates the value of repurposing and upcycling. By giving new life to an old tire, you contribute to reducing waste and promote a more sustainable lifestyle. Building a DIY tire sandbox not only creates a delightful play area for children but also serves as a practical and environmentally responsible example for future generations.
Tire Dog Bed: A Cozy DIY Tire Project for Your Furry Friend (Easy)

Time to complete: 1-2 hours
Materials needed:
An old tire
Outdoor spray paint (optional)
A round dog bed or cushion that fits inside the tire
Instructions:
Thoroughly clean the tire to remove any dirt, grime, or debris.
If desired, apply a coat of outdoor spray paint to the exterior of the tire, choosing a color that complements your home decor or your dog’s personality.
Allow the paint to dry completely.
Place the round dog bed or cushion inside the tire, ensuring a snug and comfortable fit.
Set up your new tire dog bed in your home or outdoor space, and let your furry friend enjoy their cozy new resting spot.
Benefits: Cozy Canine Comfort – The Perks of DIY Tire Dog Beds
Pampering Your Pooch: Creating a DIY tire dog bed as part of your DIY tire projects is an excellent way to provide a comfortable and stylish resting place for your furry friend. Crafting a tire dog bed offers numerous benefits that extend beyond just a cozy place for your pet to sleep.
One significant advantage of a DIY tire dog bed is its durability. Tires are designed to withstand harsh conditions and wear, making them a perfect material for a long-lasting and resilient dog bed. This sturdiness ensures that your pet’s bed will stand the test of time, even in the face of enthusiastic chewing and scratching.
Another benefit of a tire dog bed is its ease of maintenance. The rubber material is simple to clean and can be quickly wiped down or hosed off when needed. This low-maintenance aspect allows you to keep your pet’s sleeping area hygienic and fresh with minimal effort.
Additionally, a DIY tire dog bed provides a unique opportunity for customization. With a bit of paint and creativity, you can design a bed that suits your pet’s personality and matches your home decor. This personal touch makes the tire dog bed a one-of-a-kind piece that both you and your pet can appreciate.
Lastly, constructing a tire dog bed is an environmentally conscious choice that aligns with the principles of sustainability and upcycling. By repurposing an old tire, you actively contribute to reducing waste and promoting a greener lifestyle. As you explore various DIY tire projects, a tire dog bed stands out as a functional, stylish, and eco-friendly option for pampering your beloved pet.
Tire Boat Dock Fenders: A Practical DIY Tire Project for Boating Enthusiasts (Easy)

Time to complete: 1-2 hours
Materials needed:
Old tires (the number depends on the size of your dock)
Heavy-duty scissors or a utility knife
Outdoor spray paint (optional)
Weather-resistant rope or nylon straps
A drill with a 1/2-inch bit
Instructions:
Thoroughly clean the tires to remove any dirt, grime, or debris.
If desired, apply a coat of outdoor spray paint to the exterior of the tires to match your dock’s color scheme.
Drill holes on opposite sides of the tire, near the top edge. These holes will be used to secure the tire to the dock.
Thread the weather-resistant rope or nylon straps through the holes, and secure the tire to the dock with a tight knot or by attaching the straps to the dock’s hardware.
Adjust the height of the tire fenders as necessary to ensure they provide proper protection against boat impacts.
Repeat the process for each tire fender you want to install along your dock.
The Benefits: Protect Your Investment – The Advantages of DIY Tire Boat Dock Fenders
Using old tires as boat dock fenders is a practical and eco-friendly solution to protect your boat and dock from damage. Tires are made from durable rubber, which effectively absorbs and disperses the force of impacts between the boat and the dock. This helps prevent scratches, dents, and other damage to both the boat and the dock structure.
Moreover, repurposing tires as boat dock fenders reduces waste by giving new life to materials that would otherwise end up in landfills. This DIY tire project is not only easy and cost-effective but also contributes to a more sustainable and environmentally friendly boating experience. With just a few simple steps, you can create durable and functional boat dock fenders that offer peace of mind while you’re out on the water.
Tire Obstacle Course: An Exciting DIY Tire Project for Fitness Enthusiasts (Intermediate)
Time to complete: 3-5 hours
Materials needed:
Several old tires (the number depends on the size and complexity of your obstacle course)
Heavy-duty scissors or a utility knife (optional)
Sandpaper (optional)
Outdoor spray paint (optional)
Wood beams or metal poles for support (optional)
Concrete mix (optional)
Weather-resistant rope or nylon straps (optional)
Instructions:
Thoroughly clean the tires to remove any dirt, grime, or debris.
If desired, apply a coat of outdoor spray paint to the exterior of the tires to add a pop of color to your obstacle course.
Plan your tire obstacle course layout, considering elements such as tire jumps, tire tunnels, tire crawls, and tire swings.
For tire jumps, lay tires flat on the ground in a row, or stack them to create a higher jump. If creating a tire tunnel or crawl, use heavy-duty scissors or a utility knife to cut away the sidewalls, and secure the tires together with weather-resistant rope or nylon straps.
If adding support beams or poles for tire swings or other hanging obstacles, dig holes in the ground for each support, and secure them with concrete mix. Attach the tires to the supports using weather-resistant rope or straps.
If needed, sand any rough edges on the tires to prevent scrapes or injuries while using the obstacle course.
Test each obstacle for safety and stability before use.
The Benefits: Tire Obstacle Courses for Exercise and Fitness
Incorporating tires into your exercise routine or obstacle course offers a unique and challenging way to improve your overall fitness. Tire obstacle courses can help build strength, agility, balance, and cardiovascular endurance, as well as promote mental focus and perseverance.
Tire exercises, such as tire flips and tire drags, can increase functional strength and engage multiple muscle groups simultaneously, leading to a more efficient and effective workout. Furthermore, creating a DIY tire obstacle course is a cost-effective and eco-friendly solution for those looking to add variety and excitement to their exercise routines. By repurposing old tires, you not only contribute to a more sustainable lifestyle but also create a fun and engaging workout environment.
Tire Jungle Gym: An Adventurous DIY Tire Project for Endless Fun (Intermediate)
Time to complete: 4-6 hours
Materials needed:
Several old tires
Heavy-duty scissors or a utility knife
Sandpaper
Outdoor spray paint (optional)
Wood beams or metal poles for support (optional)
Concrete mix (optional)
Weather-resistant rope, chains, or sturdy straps
Instructions:
Thoroughly clean the tires to remove any dirt, grime, or debris.
If desired, apply a coat of outdoor spray paint to the exterior of the tires to add a pop of color to your jungle gym.
Stack the tires in your desired configuration, creating various levels and shapes for climbing and exploration. Ensure the tires are stable and secure, with minimal wobbling.
If adding support beams or poles, dig holes in the ground for each support, and secure them with concrete mix. Attach the tires to the supports using weather-resistant rope, chains, or straps for added stability.
Sand any rough edges on the tires to prevent scrapes or injuries while playing.
Place a soft surface, such as mulch or rubber playground tiles, around the tire jungle gym for added safety.
Supervise children as they explore and play on their new tire jungle gym.
Benefits: Embrace the Adventure – The Perks of DIY Tire Jungle Gyms
Constructing a DIY tire jungle gym as one of your DIY tire projects presents an incredible opportunity to create a stimulating and dynamic play area for children. Crafting a tire jungle gym offers numerous advantages, from fostering physical development to promoting environmental awareness.
One significant benefit of a DIY tire jungle gym is its cost-effectiveness. By repurposing old tires and utilizing a few additional materials, you can create a unique play area at a fraction of the cost of commercial playground equipment. This budget-friendly solution allows families to enjoy the excitement of a jungle gym without a significant financial investment.
Another advantage of a tire jungle gym is its ability to promote physical activity and development. Children can climb, swing, and explore the various elements of the jungle gym, improving their strength, balance, and coordination. Engaging in this type of active play also encourages the development of gross motor skills and contributes to a child’s overall physical well-being.
In addition, a DIY tire jungle gym provides a customizable play area that can be tailored to your preferences and space constraints. The flexibility in design allows you to create a jungle gym that suits your garden or backyard, making it a versatile addition to your list of DIY tire projects.
Lastly, building a tire jungle gym is an eco-friendly choice that demonstrates the importance of repurposing and upcycling. By giving new life to old tires, you contribute to reducing waste and promoting a more sustainable lifestyle. Creating a DIY tire jungle gym not only offers a captivating play area for children but also serves as a practical and environmentally responsible example for future generations.
The Benefits of Reusing Tires: Environmental and Beyond
Reusing tires through DIY tire projects not only adds a unique and personal touch to your home or outdoor space but also provides significant environmental benefits. When tires are discarded in landfills, they take up valuable space and can release harmful chemicals as they break down over time. By upcycling old tires, you are reducing waste, conserving resources, and creating something functional and enjoyable from a material that would otherwise contribute to environmental pollution.
Treads Tire Subscription: Making Tire Disposal Easy
At Treads, we understand the importance of proper tire disposal, which is why our tire subscription service includes environmentally friendly disposal of your old tires. However, if you’re inspired to tackle one of these DIY tire projects, simply ask your Treads technician to leave your old tires behind during your next tire change. This way, you can have fun with these DIY projects while knowing that any tires you don’t use will still be disposed of responsibly.
Share Your DIY Tire Projects on Instagram
We would love to see your completed DIY tire projects! Share your creations on Instagram using the hashtag #GetTreads, and you might be featured on our Instagram page. Let’s inspire each other with creative and eco-friendly ways to give new life to old tires.
Embracing Sustainability: The Endless Possibilities of DIY Tire Projects
DIY tire projects offer endless opportunities for creativity, functionality, and environmental stewardship. From tire swings and garden planters to ottomans, sandboxes, and dog beds, there’s a project for everyone. So, roll up your sleeves, grab an old tire, and embark on your next DIY adventure. With a little imagination and effort, you can transform something destined for the landfill into a valuable and enjoyable addition to your home or outdoor space. Happy crafting!
Let’s Connect!
Let us know if you try any of these DIY tire projects. We’d also love to hear about any experiences you have had with your Treads tire subscription. Connect with us on our socials: Facebook, Instagram, or TikTok. We want your 🚙 🛞 stories!
Also for more information about a Treads Tire Subscription download the Treads App in the App Store or in Google Play and live chat with a team member with any questions you may have. We are always happy to help!